Friday, July 30, 2010

Nice Knitting Bag??

A little get-a-way this week to Glenwood Springs... one of our favorite vacation places.  To escape the heat for a bit, we ventured into a Bed, Bath, and Beyond store in search of a light weight quilt for our bed at home.  We use the same comforter year-round and it's just too hot for summer.  We found this nice quilt.  I was worried it was too feminine for my husband and I pointed out a more modern "urban" design with different size and color squares, but I think he liked what we purchased since it reminds him of old quilts he grew up with.  I am pleased with the quilt we purchased, but the packaging has me tickled... it's a cute quilted tote bag!  Should make a nice knitting bag, don't you think?  Turns out the quilt is nice, too! !

I like the embroidered flower details.
It looks nice with our new blue/grey carpet and the freshly painted walls in our masterbedroom!  Finally... I am happy with the way our masterbedroom looks! Yipee!
It was not until I unfolded the quilt to discover the backside of the quilt is a stripe fabric!  I LOVE it!

Monday, July 26, 2010

Woodland Scarf is Complete

 
A few photos of my completed Woodland Scarf.  The scarf's finished length is about 66 inches and it's about 6 1/2 inches wide.  I think it's a nice size.  It blocked nicely and I like the scalloped edge.  I can picture this same pattern in other yarns, other colors, etc.  Sorry the photos are a bit dark again. As you can tell, I did take photos outside for some natural light but it was a bit shady as you can see.  I have started a new scarf with some new yarn and I am not sure what to make of the pattern I have chosen.  I am actually trying out two different patterns.  I seem to really be struggling picking the right yarn for the patterns I am chosing to make.   So much to learn!

Sunday, July 25, 2010

This weekend's knitting

Been busy knitting this weekend.  I just finished up my Woodland Scarf and, as you can see... it's on the blocking mats now.  I'll try to take some nice photos tomorrow. I used all but a few feet of the yarn for the scarf so it's a nice long length. I think the scarf will make a nice gift for my friend, Rene'.

The other day I bought some lace weight yarn.  I learned a lot from my first attempts at lace knitting this weekend.  First of all, I should have wound the yarn into a ball at the yarn shop. Within moments of unwrapping the hank of yarn at home, I just about had a yarn catastrophe!  It was hard to keep the featherweight yarn under control and get it wound into a ball.  I first started with the Swallowtail Shawl Pattern.  Then I switched to a shawl pattern called Lavalette.  I got even further on the second pattern and I totally "get" the pattern. What I learned is that I need some smaller stitch markers.  See how in the center of the shawl there is a vertical line down the center? That should be a column of single knit stitches flanked by yarn overs on both sides. My stitch markers (plastic rings) totally got in the way and made for really loopy yarn overs.  Now that I get the pattern, I think I could follow the pattern without the stitch markers.  All said and done, I was not happy with how the shawl was coming along, so I ripped out the entire thing after I snapped this photo.  I just found a third shawl pattern called Simple Yet Effective Shawl.  I really underestimated how hard knitting with lace weight yarn would be. I've decided to go with the simplest pattern possible just to get the feel of knitting lace... I'll save the Swallowtail Shawl for another day. It's beautiful but much more complicated.

Friday, July 23, 2010

Lacy Sampler Scarf... half way there

One half of the scarf
Flame Chevron Lace

Horseshoe Lace
The Cloisters
Twin Leaf Lace
Diamond Mesh

Sunday, July 18, 2010

A new cooking blog

For awhile now, I've wanted to have a cooking blog. Today, I decided to go for it.  If you'd like to check it out, click here.

I hope to post at least one original recipe each week. I am also exploring more and more vegetarian and vegan dishes, so I hope my recipes will appeal to a wide range of folks.

Saturday, July 17, 2010

Lacy Sampler Scarf


I guess I was getting a bit bored with my Woodland Scarf so I decided to start in on my Lacy Sampler Scarf. Click here to see the pattern. I am using Queensland Collection Bamboo Cotton in pale blue and I love this yarn; I've never used anything like it. The yarn is a bit slick but nice to work with. The stitch definition is very pretty.

Thursday, July 15, 2010

Woodland Scarf


I am still finding this pattern enjoyable and am now on my second ball of yarn. I was able to lay the scarf flat on my carpet and have it stay flat so you can see how the design of the pattern makes a great scalloped edge. I think the scarf will be over five feet long when it's done.

Friday, July 9, 2010

Woodland Scarf


This pattern is addictive. I did not take the best photos, but could not wait to show you how this is coming along. I highly recommend this pattern if you are looking for a fun project. It's complicated enough to keep you interested but not so tricky you get frustrated. It's fun to watch as the leaves emerge. There is a note on the pattern which calls the flow of the design "intuitive". I did not know what that meant until I started to catch on to the pattern. As you are completing the rows, you can just tell if you are on the right track because the stitches just make sense... you catch mistakes right away. That eliminates some frustration. I can picture this pattern in a baby blanket or even a lap afghan. It's that fun! I am glad I am making the smaller scarf version of this pattern; I think the color changes in the Mini Mochi yarn work well with the shorter rows. I think I like this pattern well enough to make a shawl version; I will have to find just the right yarn for it.
.

Thursday, July 8, 2010

Woodland Scarf


I found the perfect pattern for my Mini Mochi yarn. Click here to see the pattern.

Monday, July 5, 2010

Hiking Socks are Complete!


Yipee, I am glad to be done with this pair of socks and on to a new project. Socks are fun, but after the satisfaction and challenge of finishing the first sock, the second sock seems like a bit of a chore. My Hiking Socks fit like a dream and the stripes match up really well. I think I am catching on to how to make the stripes match up. Not sure what I will make next... I have a lot of sock yarn to use.

Friday, July 2, 2010

One Hiking Sock down....


One Hiking Sock down... one to go. I am using Susan B. Anderson's pattern for "Ribbed Socks for Bigger Feet" which I found on her blog called Spud and Chloe. This pattern is very similar to the Wise Hilda's Sock pattern I just finished a week or so ago. Both call for k3,p1 ribbing in the cuff and on the top of the foot, but Susan's pattern starts with 64 stitches and Hilda's socks call for 60 stitches. The ribbing in these socks makes them fit great. My yarn for these socks is On Line 
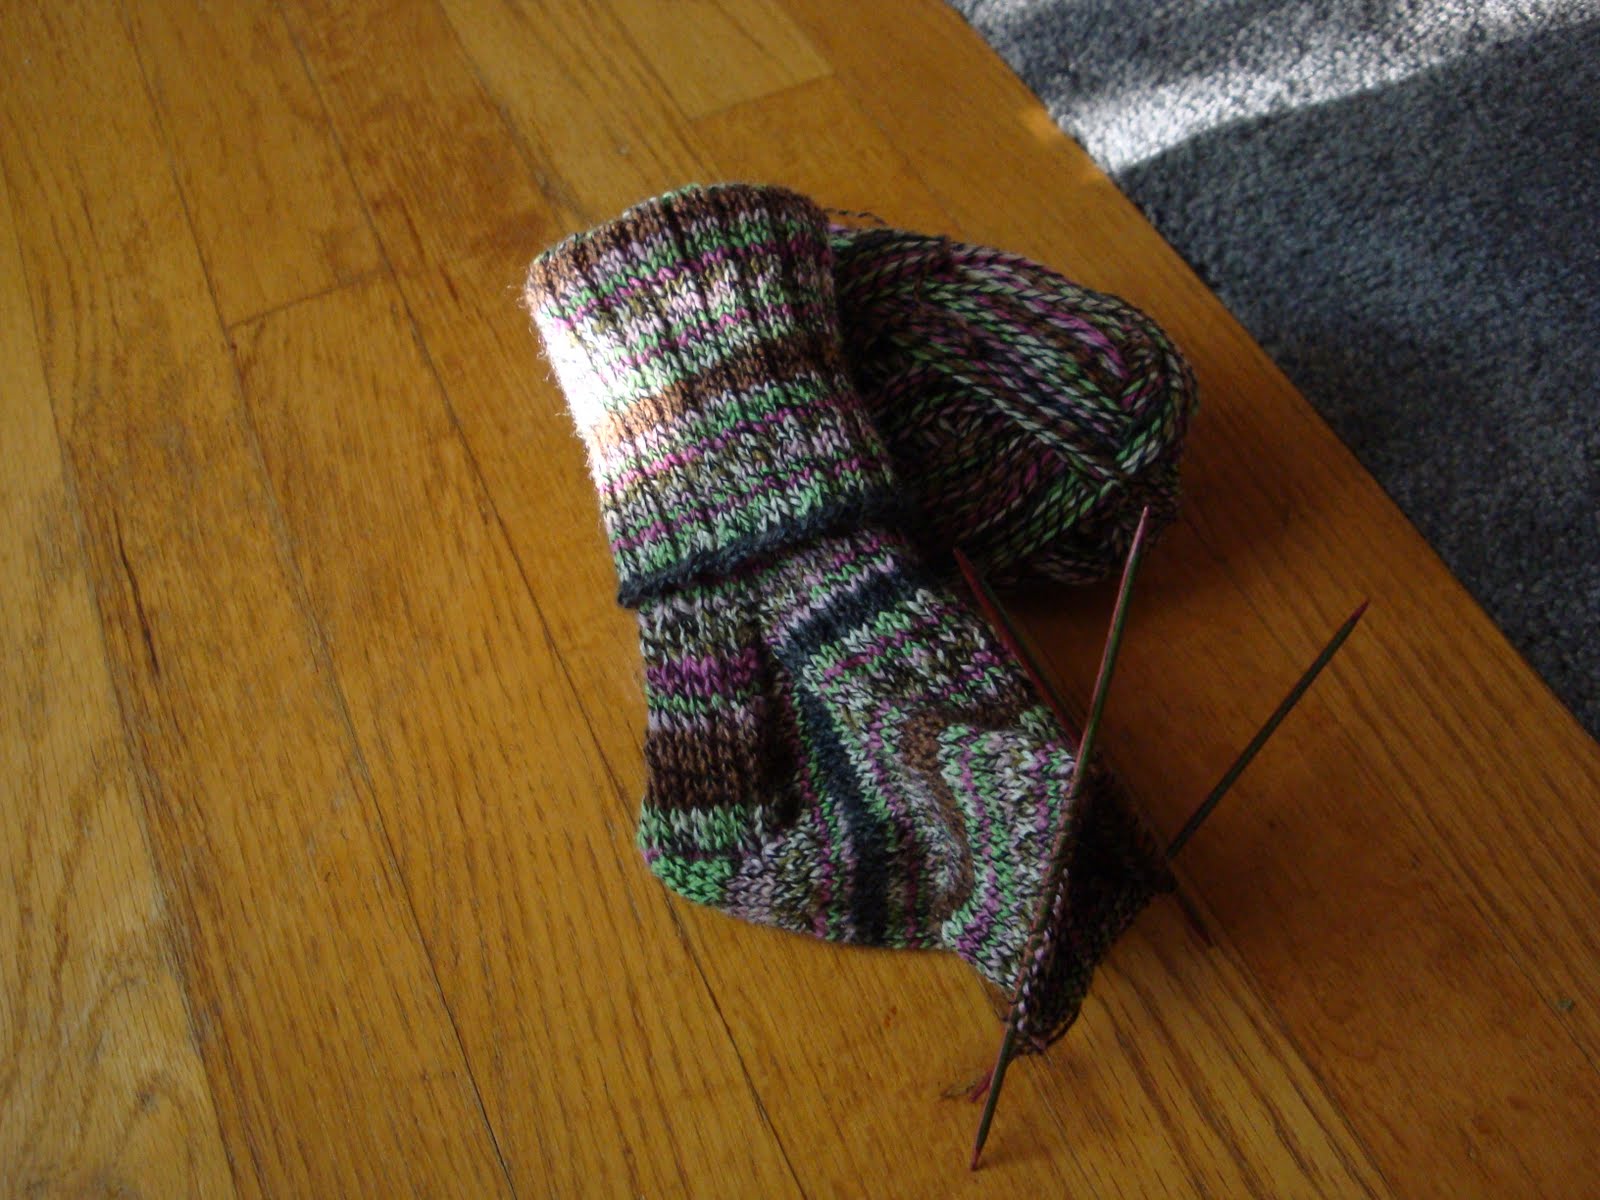
Supersocke and the colorway is called "Hiking" (I think). There is a lot of German writing on the sock label and, despite studying German for years, the label has me a bit confused. Whatever the case may be, the word "hiking" on the label got me to thinking this yarn WOULD make great hiking socks. I set out to make socks long enough that I could roll the top down for a nice cuff. I was a few inches into the cuff when I realized that when I rolled the sock down, the cuff revealed would be p3,k1 which is not as attractive as k3,p1. I got to thinking I should have started with p3,k1 and then later switched to k3,p1 part way down the cuff. Since I did not want to rip out all of my work, I got innovative and came up with a solution.

When I was about 5 1/2 inches into the cuff portion, I turned the sock inside out. The yarn was now coming from my left needle. So I brought the yarn to the front, slipped a stitch from the right needle to the left needle, wrapped the yarn to the back of that stitch, and then slipped the stitch back to the right needle, and then proceeded to knit in k3,p1 ribbing. The sock looks a little funny when the cuff is not folded down, but it looks great when I have it on. The ribbing on the cuff and the ribbing the top of the foot both match.
Here's a photo to show you where I turned it inside out. You can (hopefully) see where the ribbing changes to the left of my finger, just before the charcoal gray stripe begins. I suppose using a k2,p2 ribbing would have eliminated the need to turn the sock inside out, as would knitting p3,k1 ribbing (at the top of the sock), but I am kind of pleased with myself in that I came up with a "new technique" to solve my problem.

Thursday, July 1, 2010

Hiking Socks in progress


Working on another pair of socks this week. I am making Hiking Socks. Not much time today so I'll have to tell you more about these another day. Here are some photos I snapped this morning.