Showing posts with label felting. Show all posts

Friday, November 9, 2018

Nelkin Designs "Lolatude" Kit #2


Nelkin Designs "Lolatude" Kit #2


Woo Hoo!  My second "Lolatude" kit arrived this week. I signed up to receive a kit every other month for 12 months. This is kit #2.  This kit included some tea, a stitch marker, a skein of 100 percent wool yarn, and a pattern for an octagon-shaped pot holder.  I have not yet felted my pot holder.  I have enough yarn to make a second pot holder so I will hold off on felting until pot holder #2 is done.

The pattern design is by Laura Nelkin and the pattern is called "Another Context(A)".  When I downloaded the pattern, I also received a copy of Laura Nelkin's pattern called "Contexta".  Contexta is an afghan or shawl pattern and the projects are made by connecting knit octagons and mitered squares.  The Contexta pattern contains instructions for how to make the octagon centers differently (six different designs).  My octagon is called "Luminary Octagon".  Since I have enough yarn to make a second pot holder, I plan to try out a different design from the "Contexta" pattern.

It sure is fun to receive a mystery kit every other month.  I also love that I always learn a few new techniques from each pattern.


Here are some pattern links if you'd like to see these patterns on Ravelry.

Another Context(a) pot holder pattern: Click HERE.

Contexta afghan or shawl pattern:  Click HERE.

Sunday, October 28, 2018

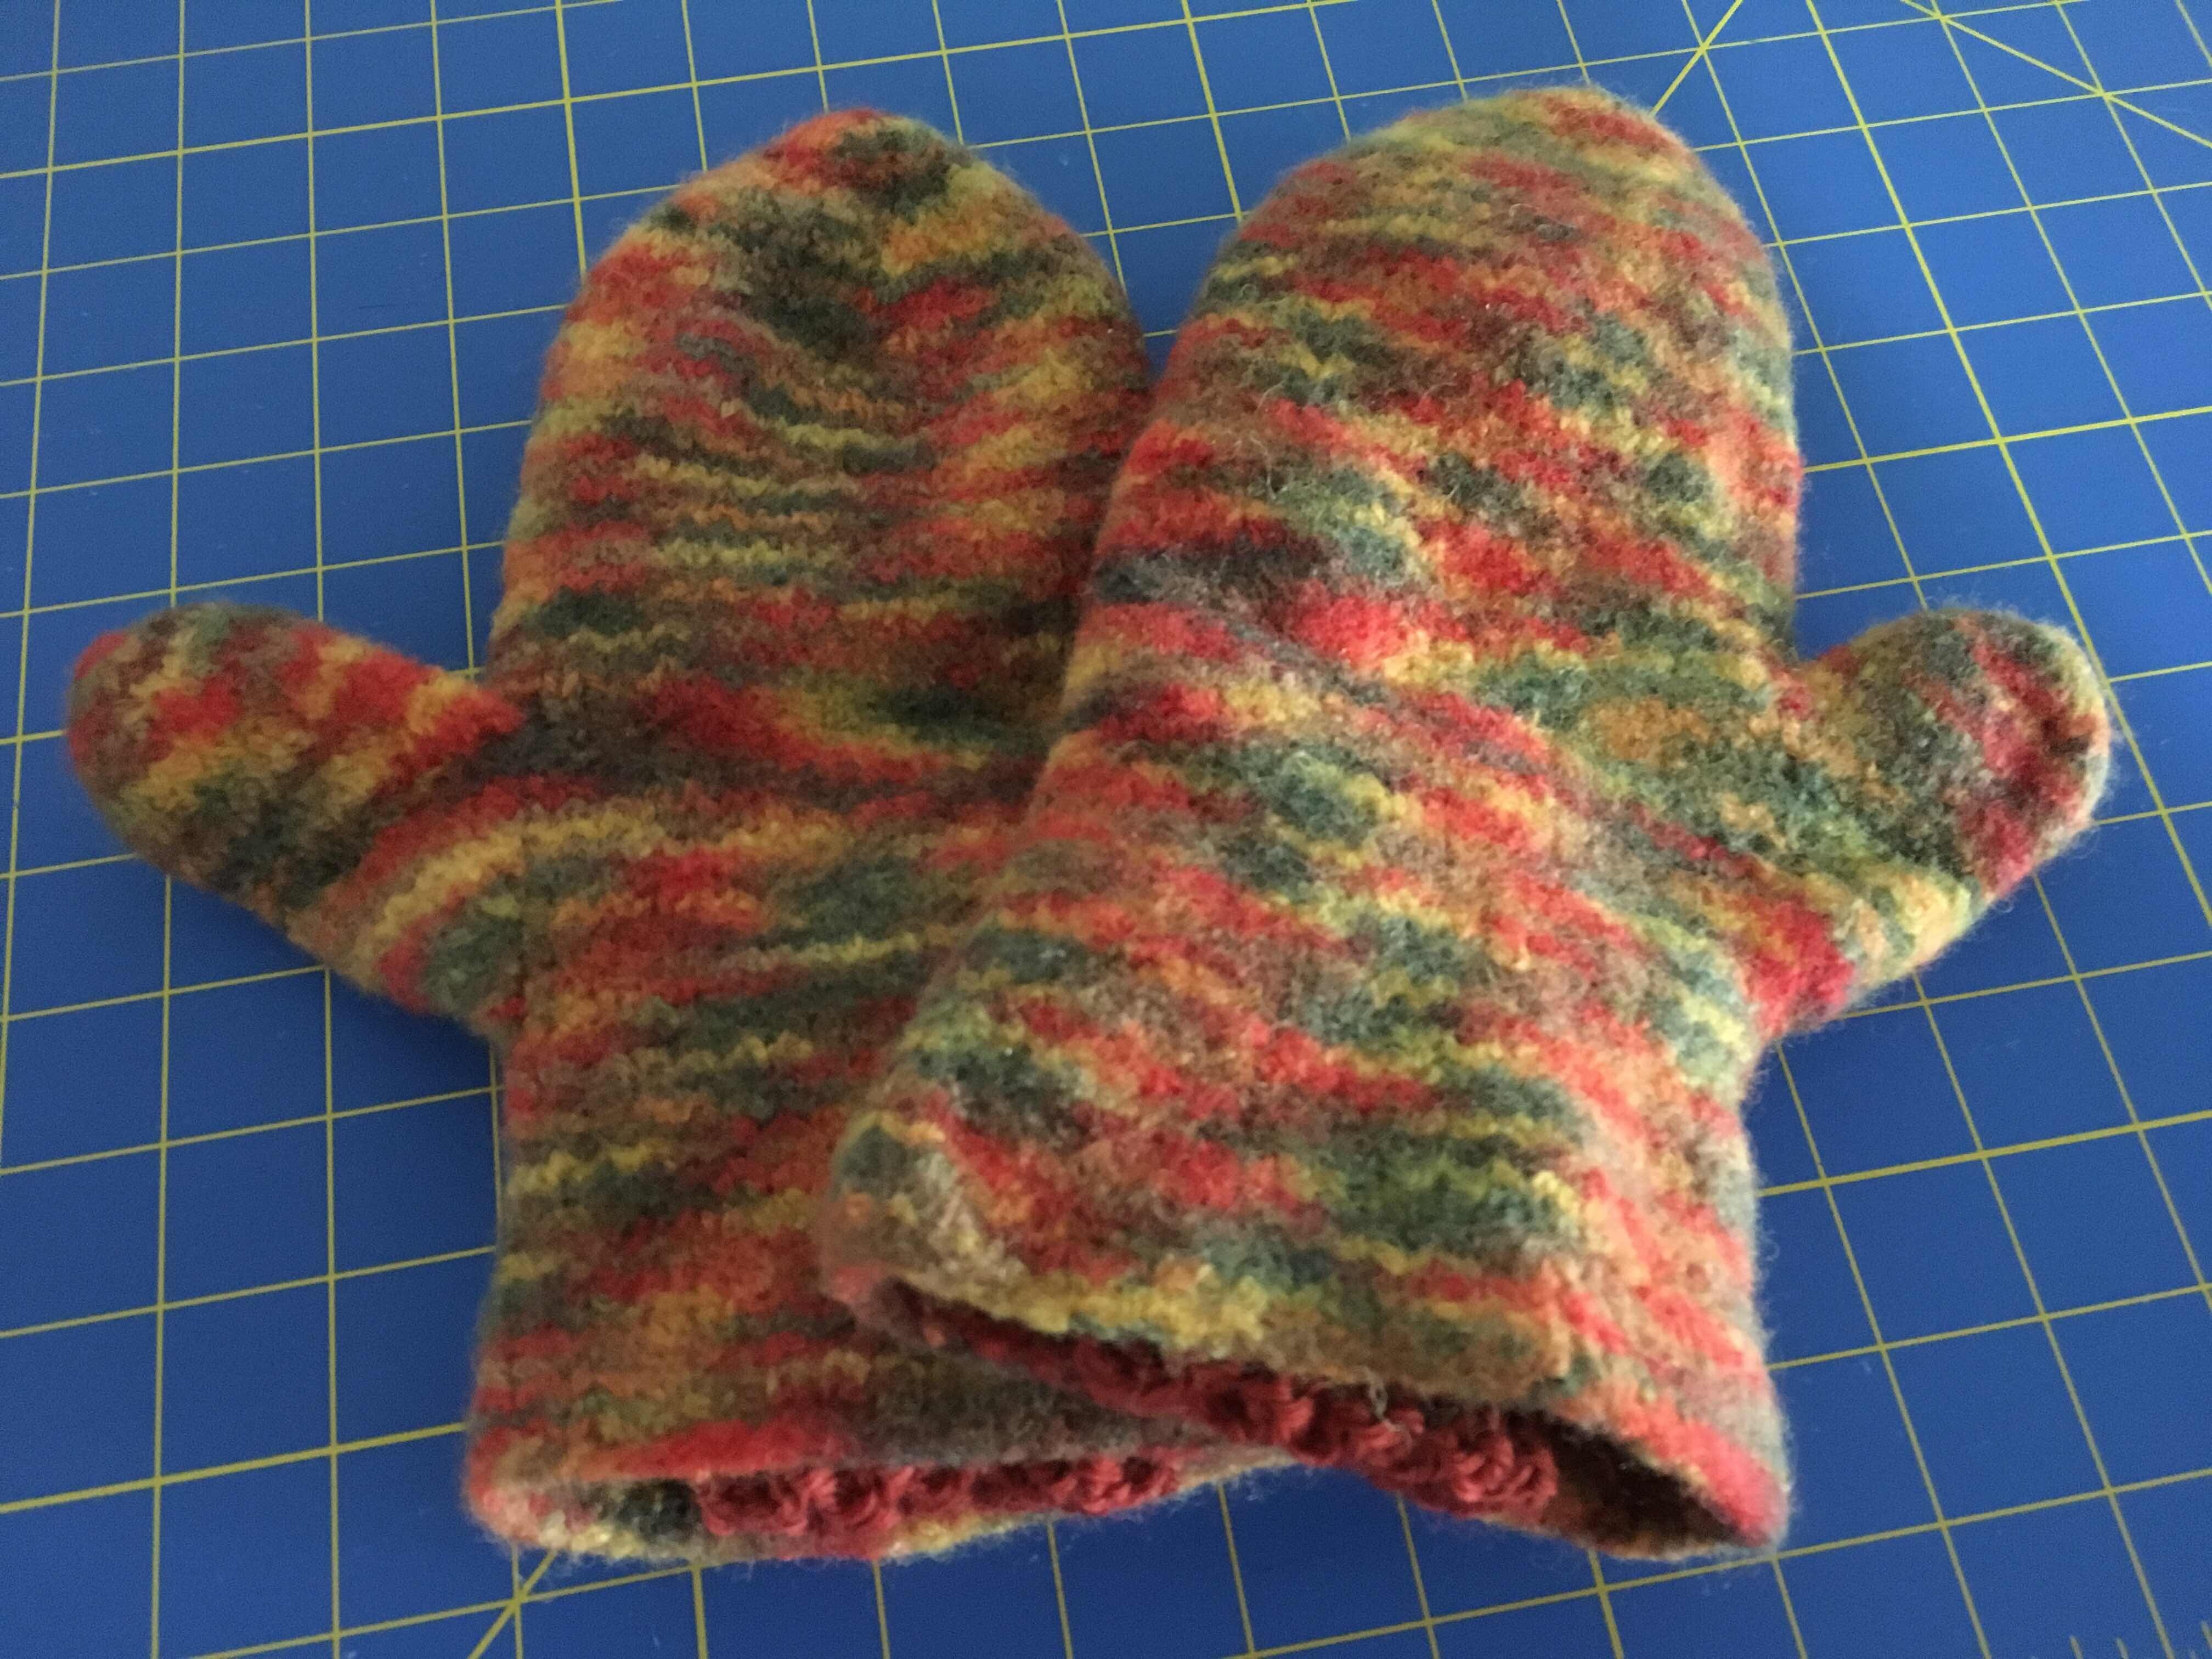
Felted Mittens


Felted Mittens


My felting frenzy is over. This is my last project but I did have a great time with all of my felted projects over the past few months... two bags, two pairs of slippers, and two oven mitts.

This is yet another pattern from a great book called "Knit One, Felt Too".  The yarn I used is Kraemer Yarns "Naturally Nazareth Worsted Merino Blend" and the colorway is called "Autumn".  The pattern from the book is called "Double-Cuff Mittens".  The mittens are worked over 40 stitches on size US 11 double pointed needles.  You felt the mittens in the clothing washer until they are the right size.  Next, you knit two cuffs for the mittens on size US 4 needles.  I used a coordinating solid yarn as you can see, but the pattern calls for using the same yarn used for the mittens.  The cuff does not get felted. It just get stitched into the inside of the mitten. Pretty darn clever, right?  Below are some photos of this project in various stages of completion.

Below, I have not yet stitched in the cuffs.


Finally stitched in those cuff (below).  The mittens are a little big on me but the snugger ribbed cuffs will keep any cold air drafts out of the mittens.  So smart!


Below... look how big these mittens are before felting!  Yowza!


Above... here are those knitted cuffs I was telling you about.


Above... Here you can see the mitten turned inside out.  I found I needed to use straight pins to hold the cuffs in place while stitching the cuff to the mitten using needle and thread.

This was a very fun project. Happy Knitting!


Monday, October 8, 2018

Scrappy Felted Bag


Scrappy Felted Bag

Here's my latest finished project.  I made this bag mostly from yarn left over from other felted knitting projects.  The pattern I sort of followed is from a book called "Knit One, Felt Too" and the project is called "Soft-and-Thick Shoulder Bag."  The pattern calls for super bulky rug wool.  I used worsted weight yarn and held two strands of yarn together while knitting the entire bag as well as the bag's handles. I also cast on a larger number of stitches and knit more rows since I was working with a totally different gauge.

It's hard to know how much yarn a project like this will use.  I was using up yarn at an alarming rate and realized I was going to run out of yarn in coordinating colors far before my bag was long enough. Lucky for me, my local yarn shop had some yarn which had been donated and the shop owner allowed me to have some to finish up my bag. The bottom of the bag, as you can see above, is aqua and white.  That's the yarn I got from Ann at the yarn shop (Yarned & Dangerous, Canon City, Colorado). Thank you, Ann!  You are the BEST!  I used many brands of yarn in this bag. Kraemer Nazareth, Brown Sheep Lamb's Pride, Cascade 220,

Below is a close up photo after felting. Sorry, this photo is a bit blurry.  The project has an interesting "heathery" look since I mostly held two different colored yarns together while knitting.


At the very beginning of this post, you can see the bag BEFORE felting.
Below, you can see the bag AFTER felting.


And below, you can see a photo of the back of the bag.
I have not been able to take great photos of this bag yet since it is still VERY wet and VERY heavy.  I left it outside to dry yesterday.  We went out to pizza for dinner and it rained while we were gone.  Whoops!


I have just one more felting project I am working on.  I'll be sure to post some photos when the project is complete. After that, I am done felting for awhile. But first let me tell you a few random things I've learned about felting recently.

1.  White wool felts more slowly than the colored wool.  No idea why; it just does.
2.  If you would like to felt wool at home, it's best to have a top loading washing machine with an agitator.  The front loading washing machines don't work as well for felting apparently.  
3.  When you are felting, it's a mess because wool fluff sluff off of your project while felting in the washing machine.  Probably not good for your washing machine or the drain, pipes, etc.  At the store in the area where you purchase linens, you can find pillow cases with zippers.  They typically cost less than $3.00 and are called "Pillow Protectors".  You can get them in various sizes.  Just go for the cheap ones.  I almost accidently purchased "waterproof" pillow protectors so be careful about that. Just throw your knitted item in the pillow protector, zip it shut, and then felt your project in the washing machine.  


Saturday, October 6, 2018

Felted Oven Mitts


Felted Oven Mitts

The past few weeks I have been making some knitted felted projects. I am using up yarn leftover from other projects. These are not the greatest photos; I took the photos at night time and the yarn colors are dark.  In some of the photos, the yarn is still wet so that makes it look darker, too.

The yarn I am using is Kraemer Mauch Chunky 100 percent wool and the colors are Eggplant and Redwood.  I was able to make up two mitts and a hot pad with what I had.  The pattern is from a book called "Knit One, Felt Too"; I borrowed the book from my local knit shop.  Thanks, Ann!  (Yarned & Dangerous, Canon City, Colorado).  In the various photos, you can see the projects before and after felting. It's so amazing how much the projects shrink up and I love how the stitch definition disappears when you felt knitted projects.  I should point out that the project pattern calls for worsted weight yarn and you hold two strands of yarn together while knitting in the round with US Size 15 needles.  I used chunky yarn so I only held one strand of yarn while knitting in the round on US Size 15 needles.  For the mitts, you cast on only 36 stitches.  These mitts are a really quick knit!


Monday, October 1, 2018

Felted Slippers... Two Pairs... Done!


Felted Slippers

A few weeks back I took a class at my local yarn shop (Yarned & Dangerous, Canon City, Colorado) where we learned how to make these cool slippers. The slippers are made with worsted weight wool yarn and a novelty yarn (eg. fun fur, ladder yarn, etc.) and then the slippers are felted to size.  You can see another post about these slippers by clicking HERE.  You can see a lot of BEFORE shots in that post. As promised, here are my AFTER shots.

These are some random photos I took of my two pairs of slippers. Yes, the first pair was so much fun, I had to make a second pair.


Below:  I stuffed some plastic grocery bags in the slippers after felting to help the slippers hold their shape a bit.  The slippers are outside on my back patio drying.


Above you can see my second pair of slippers. I am happy the variegated yarn I used for the slippers but the novelty yarn I chose was not the best option.  I used a "faux mohair" yarn and it just looks kind of grubby after felting.  My class instructor said I could brush the "mohair" with a stiff bristle brush a bit to see if that improved things. If not, I can also "shave" the slippers with a razor and get rid of some of the odd looking "fluff".


In the photo above, I had a bath towel on the floor in the laundry room. I kept pulling my slippers out of the washer and trying them on (sopping wet!) to see if the size was just right.

Below can see a photo of my second pair of slippers before felting.  They sure do change a lot, don't they?!?


Since I have some left over wool suitable for felting from my recent felted bag and felted slipper projects, I have a few more felting projects I'd like to whip up in the near future.

Until next time... Happy Knitting!

Thursday, September 20, 2018

More Fun with Felting... Slippers


Slippers


Look, I made myself some slippers!  Looks like I have a problem with my gauge and sizing, doesn't it?


No worries! This is a pair of slipper which will be felted.

This pattern is called "Mohair Ballet Slippers".  Robbie taught a class covering this pattern last Saturday at my local yarn shop (Yarned and Dangerous in Canon City, Colorado).  It was a fantastic class.  Robbie is an amazing instructor!

The yarn I used in my slippers is called "Lamb's Pride" from Brown Sheep.  I also used some novelty "ladder yarn" called "City Life" from Premier Yarns.  The construction of these slippers is so unlike what you might expect and so very clever. This is the kind of pattern that really makes me wonder about the person who designed the pattern... what made this person think to make the slippers this way?!?

The pattern starts out with 59 stitches (for the largest Adult size); you cast on while holding 2 strands of worsted weight wool yarn together.  You work back and forth on these stitches with regular increases, some wrapping and turning, short rows, etc., and then you wind up with 79 stitches and something that looks like what you see in the photo below. This will eventually become the sole of the slipper.  You cut one strand of the worsted weight yarn and then you resume knitting with one strand of the worsted weight wool yarn and one strand of mohair yarn or some kind of novelty yarn (ladder yarn, fun fur, etc.).


Below you can see a side profile of the slipper which was worked with the wool yarn and the novelty yarn at the same time. To finish off the top of the slipper, you drop the novelty yarn and you knit and purl some rows and then you make a really clever rolled hem.  To make the rolled hem, you pick up stitches inside the slipper with a spare needle and then you complete a three needle bind off for a great finished edge.

After you finish slipper, you actually make a second sole for the slipper (in the same manner you made the first sole at the beginning of the pattern, holding two stands of worsted weight yarn together). In the photo below you can see I've picked up stitches along the edge of the completed slipper and I am working on merging the two soles together with another three needle bind off.


Below is another shot of the three needle bind off in progress to attach the second sole to the bottow of the slipper.


Below... the bottom of the slippers. Looks funny and quite messy.  Perhaps you can see that I need to make a seam down the center of the first sole and then I need to make another seam down the center of the second sole.  It's kind of hard to picture.


Below you can see the first center seam is done and next I need to sew a seam down the center to close up the second sole.


And below you can see both slippers, side by side of course, with the center seams all sewn up.


This weekend we are meeting up at the yarn shop and then travelling to Robbie's home so we can all felt our slippers together.  This is really thoughtful of Robbie.  She understands that not all folks have a suitable washer for felting.  A top loading washer with an agitator is best. Apparently she had a family member who was selling their motorhome and she asked them if she could have the washing machine of the motorhome. It's smaller in size and apparently will be perfect for us to felt our slippers.

Of course, I'll share some AFTER photos when my slippers are complete.