Friday, November 2, 2018

Another Messy Bun/Ponytail Hat


Another Messy Bun/Ponytail Hat

I just whipped up another Messy Bun/Ponytail Hat.  The last project I made using this pattern can be seen HERE.  This time around, I used Cascade Pacific yarn which I really like. This is a really nice yarn that my local yarn shop carries in a variety of colors.  It's a worsted weight wool/acrylic blend and it's very reasonably priced. My favorite knitted hat that I wear all the time (and wash in the washing machine all the time) is made out of this yarn in a charcoal color and the hat still fits and looks great.

When I made the pattern this time around, I did add an extra pattern repeat (five instead of four repeats). I also went down a needle size for the ribbed brim for a snugger hat.  Oh! I added a flower. This flower is crocheted and felted and the yarn is Plymouth Yarn "Gina" (100 percent wool).

I've been working on a number of other things so hopefully I'll have something else to share sometime soon.

Happy Knitting!


Thursday, November 1, 2018

Happy Hat


Happy Hat


I just whipped up this cute little hat called "Happy Hat".  This is a pattern from the book called "One-Skein Wonders for Babies". The pattern called for Berroco Comfort and it turns out I had just enough leftover Berroco Comfort to make this hat.  The little puppy on top came from a "Top This!" hat kit (DMC Brand).

When I first looked at the photo in the book, I thought this was just a basket-weave-sort-of-hat, but the horizontal bars in the hat's design really droop down.  It kinds of reminds me of icing on the side of a wedding cake.  Does that make sense?  Then it finally occurred to me that the horizontal bars curve down like a SMILE!  Get it?!?  It's a Happy Hat!  Makes me love it even more.  This will be a gift for my niece. She's expecting a baby boy in February 2019.  This kid will never have a cold head if I have anything to do with it.  I am working on a few other projects for baby boy.  Such fun.

Thanks to Ann, the owner of "Yarned & Dangerous" in Canon City, Colorado. The best local yarn shop ever!!!  Ann has developed quite a library of great pattern books in the shop and I borrowed the book so I could make this hat.


Monday, October 29, 2018

Messy Bun /Ponytail Hat


Messy Bun/Ponytail Hat


I am growing my hair out again so I figured a Messy Bun/Ponytail Hat was in order.  This is a pattern by Debbie Fring (Bellsisterdebbie Knit Shop).  Click HERE for the pattern link.

If you've not seen a Messy Bun/Ponytail Hat, hopefully the photos are pretty self-explanatory. You knit or crochet a hat and you leave the top portion open, leaving room for your bun or ponytail.  Pretty fun, huh?

I finally got my husband to snap some photos of me wearing the hat because the selfies I was trying to take of myself were ridiculously awful.  After my husband snapped the photos and I looked at them on my phone, I saw that I was photobombed by my little girl dog (Sandy) in every photo my husband took. Too cute!

So the awful photos of this hat (where my head is never centered in the photo!) are my selfies.  And the photos with my dog are the photos my husband took.  I am putting them all here for you to see.  I was cracking up when I could not take a half-way decent photo of my head.  Doh!


Nope, not centered!


Ugh, BLURRY!


Hey, I spy "Sandy"!


Blurry and off-center.  Why is this so HARD!

Oh, I should mention. This is yarn from a company called "Retold Yarns" from Lakewood, Colorado (Etsy Shop link is HERE).  I purchased this yarn at the Salida Fiber Festival (Salida, Colorado) in September 2018.  The yarn is worsted weight and the colorway is called "I am Groot".  I bought the yarn because the name is great... and I like the colors.

Happy Knitting!

Sunday, October 28, 2018

Felted Mittens


Felted Mittens


My felting frenzy is over. This is my last project but I did have a great time with all of my felted projects over the past few months... two bags, two pairs of slippers, and two oven mitts.

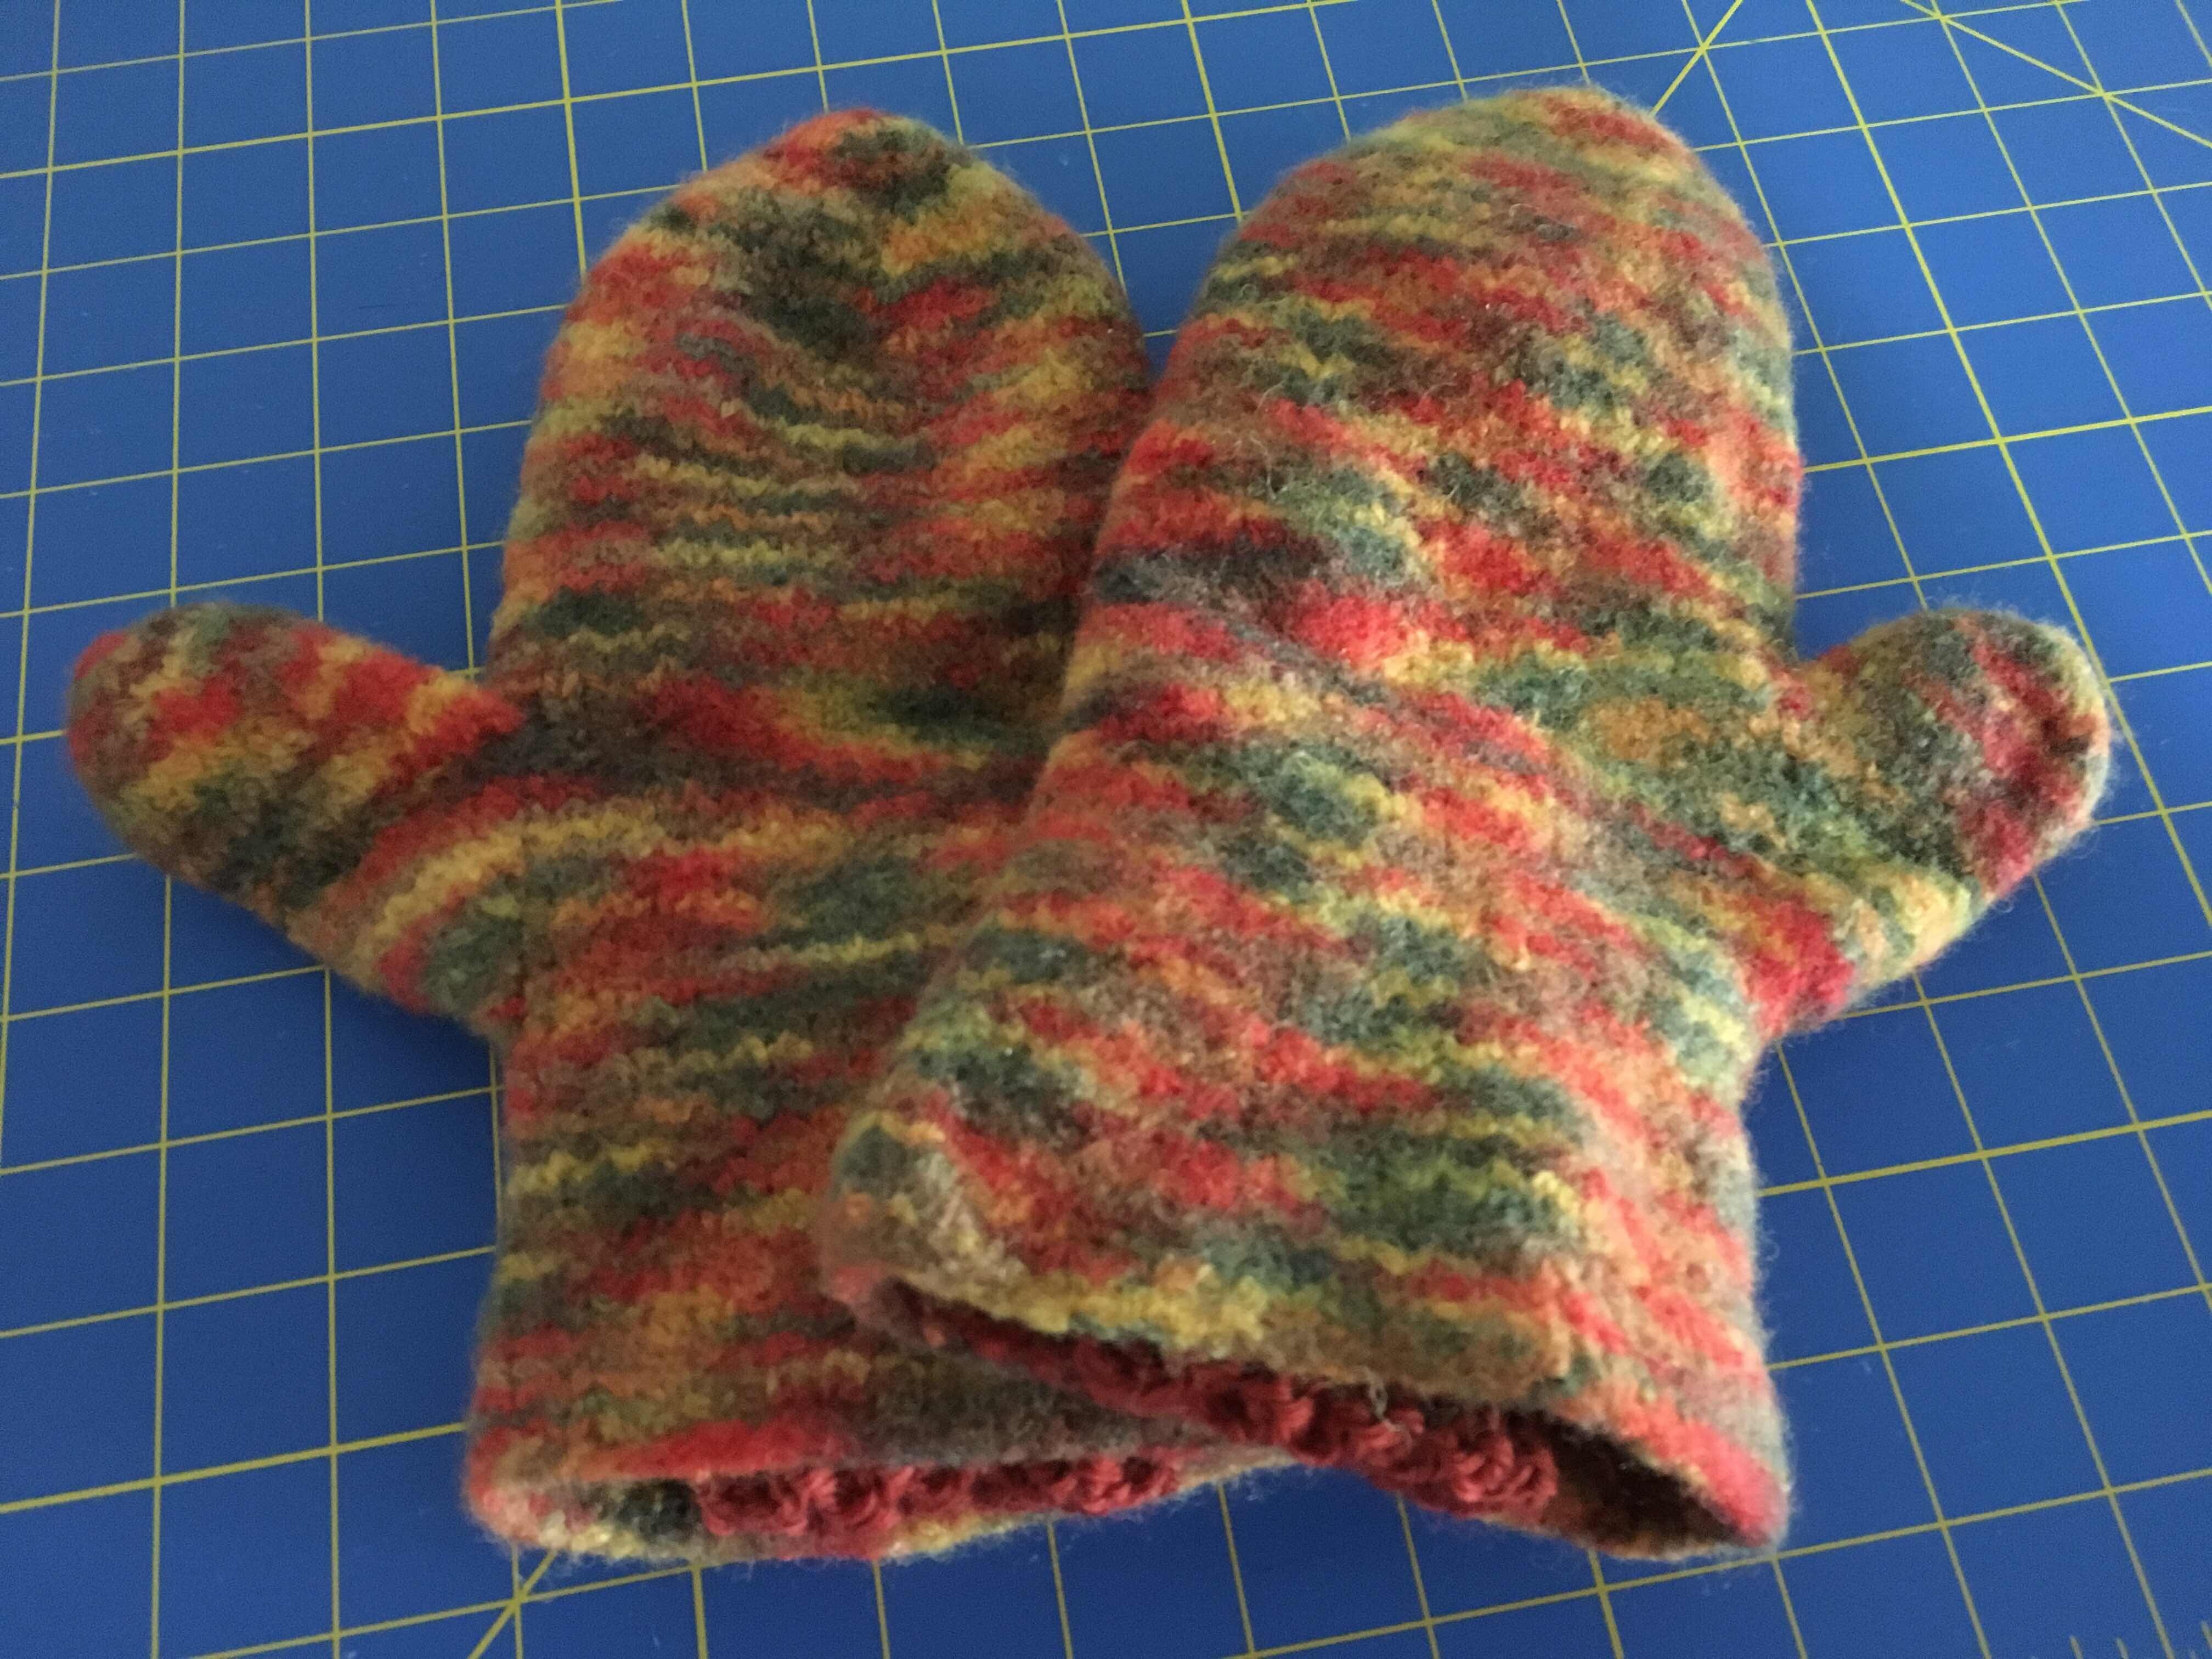
This is yet another pattern from a great book called "Knit One, Felt Too".  The yarn I used is Kraemer Yarns "Naturally Nazareth Worsted Merino Blend" and the colorway is called "Autumn".  The pattern from the book is called "Double-Cuff Mittens".  The mittens are worked over 40 stitches on size US 11 double pointed needles.  You felt the mittens in the clothing washer until they are the right size.  Next, you knit two cuffs for the mittens on size US 4 needles.  I used a coordinating solid yarn as you can see, but the pattern calls for using the same yarn used for the mittens.  The cuff does not get felted. It just get stitched into the inside of the mitten. Pretty darn clever, right?  Below are some photos of this project in various stages of completion.

Below, I have not yet stitched in the cuffs.


Finally stitched in those cuff (below).  The mittens are a little big on me but the snugger ribbed cuffs will keep any cold air drafts out of the mittens.  So smart!


Below... look how big these mittens are before felting!  Yowza!


Above... here are those knitted cuffs I was telling you about.


Above... Here you can see the mitten turned inside out.  I found I needed to use straight pins to hold the cuffs in place while stitching the cuff to the mitten using needle and thread.

This was a very fun project. Happy Knitting!


Saturday, October 27, 2018

Top This! Hats


Top This! Hat Kits


Just a quick post to show you a few things I've finished lately. The company called "DMC" has the cutest hat kits called "Top This!".  They are a single ball of yarn that fades from one yarn to the next and, instead of a pom pom, the kit comes with a little stuffed item to use on top of the hat.  Super cute!  I've made some of these hats before and the DMC company keeps coming out with new and different kits.  I love them all.  Unicorn, penguin, soccer ball, Santa, elephant, owl, bear, and so on and so on...

You can see more about these kits HERE or perhaps you can find them at your local yarn shop like I did.  You can also find free patterns on Ravelry to make this kit into various size hats or another project if you would prefer something other than a hat.

Thursday, October 11, 2018

Luscious Lace Scarf


Luscious Lace Scarf


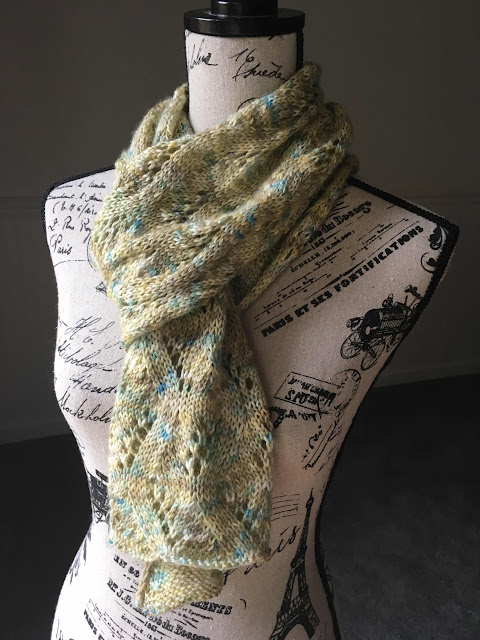
This pattern is called "Luscious Lace Scarf". It's a free pattern which can be found on Ravelry.  I knit this project using the very last of my hand dyed yarn.  I had the opportunity to attend a yarn dyeing workshop this past summer at my local yarn shop (Yarned & Dangerous, Canon City, Colorado). The class was taught by Peggy (The 100th Sheep).

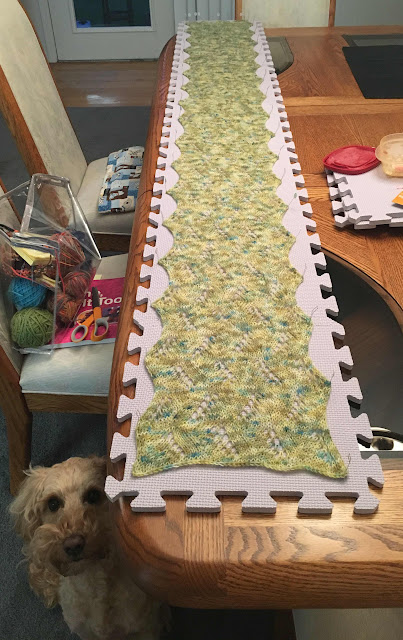
When I knit this rectangular shaped scarf, I did modify the pattern slightly.  First, I cast on only 52 stitches; the pattern as written called for a greater number of stitches. I wanted a longer, narrower scarf.  My scarf is about seven feet long and about nine inches wide.  Second, the pattern calls for slipping the last stitch of each row; I slipped the first stitch of each row instead.  I did this because I found it difficult to work the slipped stitches after I turned my work each row if slipped the last stitch. Slipping the first stitch of each row worked better for me and gave the scarf a nice looking edge on both the right and left sides.


Here a few photos of the yarn I dyed. If I have the opportunity to dye more yarn in the future, I'll definitely jump at the chance. It's very fun!


Monday, October 8, 2018

Scrappy Felted Bag


Scrappy Felted Bag

Here's my latest finished project.  I made this bag mostly from yarn left over from other felted knitting projects.  The pattern I sort of followed is from a book called "Knit One, Felt Too" and the project is called "Soft-and-Thick Shoulder Bag."  The pattern calls for super bulky rug wool.  I used worsted weight yarn and held two strands of yarn together while knitting the entire bag as well as the bag's handles. I also cast on a larger number of stitches and knit more rows since I was working with a totally different gauge.

It's hard to know how much yarn a project like this will use.  I was using up yarn at an alarming rate and realized I was going to run out of yarn in coordinating colors far before my bag was long enough. Lucky for me, my local yarn shop had some yarn which had been donated and the shop owner allowed me to have some to finish up my bag. The bottom of the bag, as you can see above, is aqua and white.  That's the yarn I got from Ann at the yarn shop (Yarned & Dangerous, Canon City, Colorado). Thank you, Ann!  You are the BEST!  I used many brands of yarn in this bag. Kraemer Nazareth, Brown Sheep Lamb's Pride, Cascade 220,

Below is a close up photo after felting. Sorry, this photo is a bit blurry.  The project has an interesting "heathery" look since I mostly held two different colored yarns together while knitting.


At the very beginning of this post, you can see the bag BEFORE felting.
Below, you can see the bag AFTER felting.


And below, you can see a photo of the back of the bag.
I have not been able to take great photos of this bag yet since it is still VERY wet and VERY heavy.  I left it outside to dry yesterday.  We went out to pizza for dinner and it rained while we were gone.  Whoops!


I have just one more felting project I am working on.  I'll be sure to post some photos when the project is complete. After that, I am done felting for awhile. But first let me tell you a few random things I've learned about felting recently.

1.  White wool felts more slowly than the colored wool.  No idea why; it just does.
2.  If you would like to felt wool at home, it's best to have a top loading washing machine with an agitator.  The front loading washing machines don't work as well for felting apparently.  
3.  When you are felting, it's a mess because wool fluff sluff off of your project while felting in the washing machine.  Probably not good for your washing machine or the drain, pipes, etc.  At the store in the area where you purchase linens, you can find pillow cases with zippers.  They typically cost less than $3.00 and are called "Pillow Protectors".  You can get them in various sizes.  Just go for the cheap ones.  I almost accidently purchased "waterproof" pillow protectors so be careful about that. Just throw your knitted item in the pillow protector, zip it shut, and then felt your project in the washing machine.